Special Settings LCFGamestick: Where to Find Them and How to Tune Them
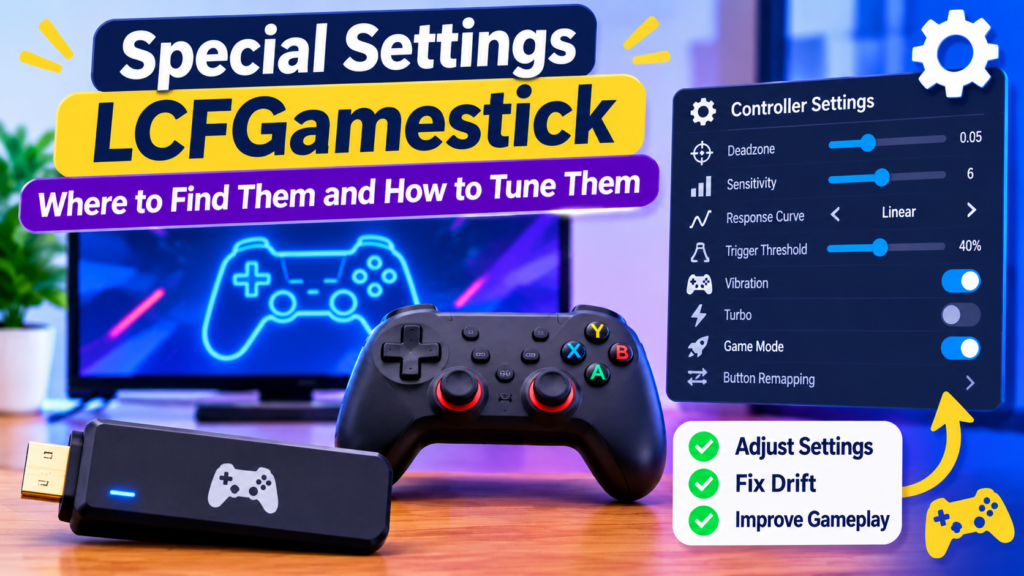
Search for special settings lcfgamestick and you will find pages that describe four different products. One calls it an arcade-style fight stick, another a thumb-sized HDMI stick, another a retro handheld, and one treats it as a server configuration tool. If you follow advice written for the wrong device, you can waste an evening or break a working setup.
This guide fixes that. It helps you identify what you own, explains each setting in plain language, gives starting values you can test yourself, and marks what is verified and what is only community-reported. The tuning principles apply to almost any controller or game stick, even if your menu labels differ.
Which LCFGamestick Do You Actually Have?
The name is used loosely online, and there is no confirmed manufacturer manual to settle it. Here are the four versions that appear in current search results and how to tell them apart.
| Version described online | How to recognize it | Do these settings apply? |
|---|---|---|
| HDMI game stick | Small stick that plugs into a TV, powered by micro-USB, often with a microSD card | Yes, mostly controller and display options |
| Arcade-style stick (described as “Low-Center-of-Force”) | Joystick with microswitches, usually with a button layout | Partly. Deadzone settings may not exist |
| Retro handheld | Screen and built-in buttons, runs emulators or custom firmware | Yes, but menus vary by firmware |
| Config management tool | Command-line software with manifests and logs | No. This is a different topic entirely |
If your device has no screen, plugs into a TV and takes a memory card, you most likely have the HDMI stick. If it has a physical joystick with clicking switches, you have the arcade-style version. If you are typing commands in a terminal, you are on the wrong page.
Quick identification checklist
- Check the back or bottom of the device for a model number, FCC ID or serial label.
- Look at the box or order confirmation for the seller’s name, not just the product title.
- Note how it connects: HDMI, USB, Bluetooth or a built-in screen.
- Open the system menu and write down the firmware or version number, if it shows one.
- Take photos of the device and menu before you change anything. You will want them for support requests.
What “Special Settings” Means on a Game Stick
On most game sticks and controllers, “special settings” is a catch-all label for options that sit outside normal setup. These usually control how the device reads your physical inputs and sends them to the game. Wi-Fi, display and account options are normally kept separate.
Where the menu usually lives
Menu names vary, but you will typically find these options in one of three places:
- The main system settings, under a tab named Controller, Input or Advanced.
- A per-game profile screen that appears after you launch a title.
- A companion app on your phone, if the device supports one.
One page in the search results lists a “Game Mode” toggle and a deadzone slider under analog controls. Treat that as a pointer rather than a guarantee, since your firmware may label things differently. The safest habit is to open every submenu once and note what each contains. When you check the special settings lcfgamestick menu on your own unit, write down the names exactly as they appear.
Why the labels differ
Many of these devices share generic firmware, and sellers rename features. “Sensitivity” on one device can be “Stick Speed” on another. The table in the next section groups settings by function so you can match them even when the names change.
Special Settings LCFGamestick Reference Table
Use this table to map whatever your menu calls an option to what it actually does. The starting values are common baselines used by many players, not verified manufacturer defaults. Always test on your own unit.
| Setting (common names) | What it controls | If set too low | If set too high | Common starting point |
|---|---|---|---|---|
| Deadzone | Stick movement ignored near the center | Drift, phantom movement | Delayed or sticky response | 0.05 (5%) |
| Sensitivity (Stick Speed) | How far the in-game input moves per physical movement | Sluggish aiming | Overshooting targets | Mid-range, around 6 on a 1 to 10 scale |
| Response curve | Relationship between stick travel and output | Not applicable | Not applicable | Linear |
| Trigger threshold | How far a trigger moves before registering | Accidental presses | Late presses | 30 to 50% |
| Vibration (Rumble) | Force feedback strength | Little feedback | Distraction, battery drain | Off for competitive play |
| Turbo | Repeated button presses while held | Not applicable | Can break menus and some games | Off by default |
| Game Mode | Reduces processing between input and screen | Not applicable | Not applicable | On |
| Button remapping | Reassigns which button does what | Not applicable | Not applicable | Default layout first |
The sensitivity and deadzone figures come from a community page on the topic. They match common practice, but nothing confirms them as official values.
Settings Explained in Plain Language
Deadzone
A deadzone is a small area around the stick’s center where movement is ignored. Every analog stick wears over time and drifts slightly. The deadzone hides that drift so your character does not creep while your hand is still.
Set it as small as possible without drift. Raise it in small steps, such as 0.02 at a time, until the on-screen cursor stops moving by itself. If your device uses microswitches, as the arcade-style version reportedly does, the stick registers directions as clicks rather than a range, so this setting may be missing or irrelevant.
Sensitivity
Sensitivity scales how much the game reads from each physical movement. Shooters and racing games reward careful tuning here, while menu-based games barely care. Change it one notch at a time and play for at least ten minutes before judging, because your hands adapt quickly.
Response curve
The curve decides how output grows as you push the stick further. A linear curve gives a one-to-one feel and is easiest to learn. A curve with a flatter start gives finer control near the center, which suits aiming. A steeper start reacts faster to small movements, which suits fast direction changes. Beginners should start with linear and change only after identifying a specific problem.
Trigger threshold
This sets how far a trigger must move before the game counts a press. A low threshold gives a hair-trigger feel that suits shooters. A high one prevents accidental presses in racing games, where you modulate throttle. If a button seems to fire on its own, raise this before assuming the hardware is faulty.
Button remapping and turbo
Remapping lets you move actions to different buttons. It helps left-handed players and anyone with limited reach. Keep one saved profile on the default layout, so you can always return to a known state.
Turbo repeats a press automatically while you hold a button. It can help in some arcade shooters, but many online games and tournaments ban it, and it can also confuse menus. Leave it off unless a specific game needs it.
Vibration
Vibration drains battery on wireless setups and adds noise to inputs for players who rest their hands on the grips. Turn it off if you play competitively or if your device runs on a limited power supply.
Game mode and latency
Game mode reduces extra image processing on your TV or on the stick itself. It matters more than any controller tweak if your screen adds delay. If your TV has its own game or low-latency mode, enable that as well, since controller settings cannot fix display lag.
Best Starting Values by Game Type
Different games reward different setups. Use these as first drafts, then adjust one value at a time.
| Game type | Deadzone | Sensitivity | Curve | Other notes |
|---|---|---|---|---|
| Fighting games | Small or off | Low to mid | Linear | Prefer the D-pad or a digital stick; consistency matters more than speed |
| Racing and sims | Small | Mid, around 35 to 40% if shown as a percentage | Linear | Raise trigger threshold slightly to avoid accidental throttle |
| Shooters | Small to mid | Mid | Slow start or linear | Low trigger threshold for faster firing |
| Action and RPG | Mid | Mid | Linear | Keep vibration on if you like feedback |
| Retro and emulation | Small | Mid | Linear | Use the per-game profile; each emulator may add its own input layer |
| Casual and party games | Default | Default | Linear | Do not over-tune |
The racing sensitivity range above also comes from a community source. Treat it as a reference point and test it on a track that has both tight corners and long straights.
For emulation, one source claims the special settings lcfgamestick feature works like Steam Input. We could not confirm that, so do not rely on it. Check whether your emulator has its own controller menu, because settings can stack and cause double adjustments.
A simple tuning order
- Fix drift with the deadzone.
- Choose a response curve, preferably linear.
- Set sensitivity.
- Adjust trigger thresholds.
- Last, remap buttons and decide on turbo and vibration.
Changing one category at a time makes it clear which change helped.
How to Test Your Changes
Tuning by feel alone leads to guessing. A short repeatable test gives you evidence, and you can run it with no special equipment.
- Pick one game and one level or practice mode you can repeat.
- Record your starting settings with a phone photo of each screen.
- Run a drift test: leave the stick untouched for 30 seconds and watch for cursor or camera movement.
- Run a precision test: repeat the same task five times, such as hitting a target or completing one lap, and note the results.
- Change exactly one setting, then repeat the same test.
- Keep the change only if your results improve or the controller feels clearly better.
- Save the final result as a named profile.
If you notice the screen lagging behind your inputs regardless of settings, test with the stick connected to a different HDMI port or a different display. This separates controller problems from TV problems.
Saving, Backing Up and Resetting Profiles
Good settings are worth keeping. The way you save them depends on your version.
| Device type | Likely save method | Backup suggestion |
|---|---|---|
| HDMI game stick | Saved in the system menu or on the microSD card | Copy the card contents to your computer |
| Arcade-style stick | Often stored on the device or in a companion app | Screenshot your settings |
| Retro handheld | Saved with the firmware or emulator | Copy the config folder |
For any version, follow these habits:
- Name profiles by game, such as “Racing – Controller” or “Fighting – D-pad”.
- Keep one untouched default profile.
- Back up the microSD card before updating firmware.
- Write down your final values in a note, so you can rebuild them after a reset.
A factory reset usually erases custom profiles, so only use it after you have backed everything up. The special settings lcfgamestick options may reset to defaults too, so reapply them from your notes. If your menu has no profile feature, photos of each screen are the fallback.
Troubleshooting Common Problems
| Symptom | Likely cause | What to try |
|---|---|---|
| Cursor or camera drifts on its own | Worn stick or deadzone too small | Raise deadzone in small steps; clean around the stick |
| Controller not detected | Loose connection or unpowered USB hub | Plug directly into the main port, not through a hub |
| Settings do not save | Full or loose storage card, or a read-only mode | Reseat the card, check free space, try saving again |
| Input lag | TV processing or wireless interference | Enable the TV game mode; try wired; move closer |
| Random button presses | Trigger threshold too low or worn switches | Raise the threshold; test another controller |
| No signal after boot | Tight HDMI port | Use an HDMI extender and try another port |
| Game ignores your profile | Emulator or app overrides input settings | Check the app’s own controller menu |
One community page claims unpowered hubs cause most detection failures. The page cited no source, so don’t treat the percentage as reliable. Connecting directly is still sound advice because it removes a variable.
Firmware and Safety Warnings
Several sites push custom firmware as an easy upgrade for handheld versions, naming options like ArkOS and JELOS. Firmware can add features, but it also carries real risk. Before you flash anything, consider the following:
- Confirm your exact hardware model first. Firmware for one board can brick another.
- Download only from the project’s official site or repository, never from a random link.
- Back up your original system and storage card before starting.
- Expect your warranty to be void.
- Do not flash if you cannot identify your hardware.
Counterfeit and rebranded sticks are common in this category. Signs include no clear seller identity, a model name that changes between listings, no documentation, and reviews that mention completely different hardware. If you are buying a new unit, pick a seller with a stated return policy, and keep the order record. For US buyers, that record matters if you need a refund or a chargeback.
What We Could Not Verify
You should know where this guide stops. Based on current search results for the special settings lcfgamestick topic:
- No official manual or manufacturer page turned up.
- The sources that give exact values do not show their testing method.
- Competing pages disagree on what the device is.
- No source provided screenshots of the actual menu.
That is why this guide gives starting points and a testing method rather than promised results. If you own one of these devices, your own measurements are more reliable than any single website, including this one. If you can confirm your model and firmware, notes on your own menu names would make this information better for everyone.
Final Checklist
Before you play, confirm the following:
- You know which type of LCFGamestick you have.
- You photographed your original settings.
- Drift is fixed with the smallest deadzone that works.
- Your curve is linear unless you have a reason to change it.
- Turbo and vibration are set deliberately.
- You saved a named profile and backed up your storage.
- Your TV is in game mode.
Following this order gives you a stable base. From there, small adjustments for each game will do more than any single “secret” setting.
Frequently Asked Questions
What are the special settings on an LCFGamestick?
They are input options such as deadzone, sensitivity, response curve, trigger threshold, vibration and turbo. Exact names depend on your firmware and device type.
Where do I find the special settings?
Look under Controller, Input or Advanced in the system menu, or in a per-game profile screen. Some versions use a phone companion app.
What deadzone should I use?
A common starting point is about 0.05. Raise it only if you still see drift, and lower it if inputs feel delayed.
Is turbo safe to use?
It will not harm the device, but many games and tournaments prohibit it. Leave it off unless a specific game needs it.
Why does my controller drift?
Usually because of wear, dirt or a deadzone that is too small. Raise the deadzone slightly and clean around the stick.
Do the same settings work for emulators?
Often yes, but emulators can have their own input menus. Check both, so adjustments do not stack.
Should I flash custom firmware?
Only if you can confirm your exact hardware and download from the official project. Back up first, because a bad flash can make the device unusable.
How do I reset my settings?
Use the system menu’s reset or restore option if it exists. Back up your profiles first, since a reset can erase them.
Is LCFGamestick an official product?
We could not find an official manufacturer page. Check the seller, return policy and model number before buying.