How to Configure Lcfgamestick: A Step-by-Step Setup Guide for US Users
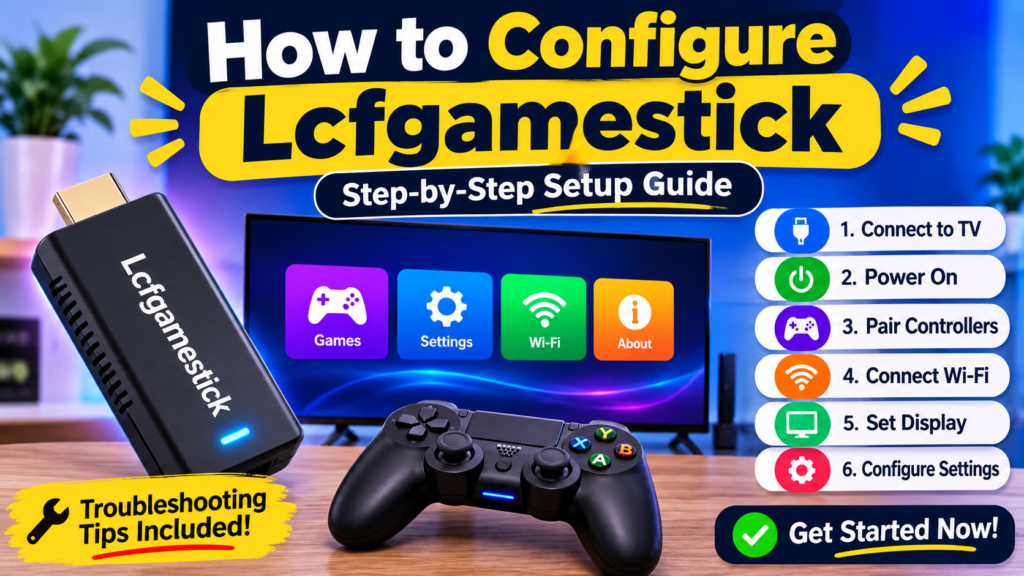
Search for “lcfgamestick” and you will find controller reviews, HDMI game stick setup pages, handheld firmware guides, and even a DevOps tutorial. The name is used loosely, and most pages never tell you which product they mean. That is why so many setup attempts fail before the first game loads.
This guide fixes that problem first. It shows you how to identify what you actually have, then walks through how to configure lcfgamestick hardware in the order that avoids the most common failures: connection, power, pairing, display, controls, storage, and updates. Every step includes what to check if it goes wrong.
One note on method: menu names differ between firmware versions and clone manufacturers, so this guide describes what each setting does and where to look rather than promising an exact menu path. Where a number is a typical value, it is labeled that way.
Before You Start: Which Lcfgamestick Do You Have?
The word “Lcfgamestick” gets attached to at least three different kinds of devices. The right setup steps depend on which one is in your hands.
| Device type | What it looks like | Typical connection | Where most setup problems happen |
|---|---|---|---|
| HDMI game stick | Thumb-sized stick that plugs into a TV, sold with one or two controllers and a microSD card | HDMI to TV, micro-USB or USB-C for power | Power supply, HDMI input, microSD seating |
| Arcade-style controller | Stick or box with microswitches and buttons, sometimes called low-center-of-force | USB cable or wireless dongle to a PC, console, or emulator | Detection, deadzone and button mapping |
| Handheld | Portable screen device that runs a Linux-based emulation OS | Built-in screen, optional HDMI out | Firmware, SD card format, Wi-Fi |
Pages that treat all three as one product give instructions that sound confident and fit none of them. If a guide tells you to plug “the stick” into “the LCF system” without defining either, close it.
A 60-Second Identification Checklist
Go through this list before you touch any cable:
- Look for a screen. If the device has its own display, you have a handheld.
- Look for an HDMI plug. A male HDMI connector on the device means it is an HDMI game stick.
- Look for joystick hardware. If the main body is a stick and buttons with a USB cable, it is a controller.
- Check the label. Look for a model number, FCC ID, or brand name on the back, the box, or the controller.
- Check the listing. Open the page where you bought it and screenshot the title, seller name, and photos.
Save the screenshot. If the device turns out to be defective or misrepresented, you will need it for a return.
Why Identification Matters More for US Buyers
Most of these devices are unbranded imports sold through marketplaces. Several things are worth knowing before you spend an hour on setup:
- Power adapters are not always US-grade. Included wall adapters vary in quality, and a weak one causes random reboots that look like software bugs.
- Return windows are short. Amazon, eBay, and Walmart Marketplace each have their own window, and third-party sellers can set stricter terms. Set up the device the day it arrives.
- Support rarely exists. There is usually no manufacturer support line, so the steps in this guide are what you have.
What You Need Before You Begin
Gather these items first so you are not hunting for a cable mid-setup:
- The device and everything in the box (controllers, dongle, HDMI extender, cables)
- A TV or monitor with a free HDMI port
- A wall power adapter rated for 5V (check the label for amperage, usually 1A or 2A)
- A microSD card, if your model uses one, from a known brand
- A phone or laptop for looking up the model number and downloading updates
- Fresh batteries or a charged battery for wireless controllers
A card reader is also useful. It lets you check the SD card from a computer if the device refuses to boot.
Step 1: Connect the Device to Your TV
This is where more than half of “it doesn’t work” cases start, so slow down here.
HDMI Connection
Plug the stick directly into the TV or monitor HDMI port. If the TV port is recessed or crowded by a soundbar cable, use the included HDMI extender. A stick that is only partly seated will give you a flickering picture or no signal at all.
Avoid HDMI splitters and cheap switch boxes during first setup. They can break the handshake between the stick and the TV. Once everything works, you can try adding them back.
Power: Wall Adapter vs TV USB Port
Most sticks take power over micro-USB or USB-C. You have two options, and they are not equal:
| Power source | Pros | Cons |
|---|---|---|
| Wall adapter | Stable current, powers on when the TV is off | Uses an outlet |
| TV USB port | Convenient, one cable less | Many TV ports supply under 1A, and some turn off with the TV |
If the stick restarts when a game loads, or the screen goes black in the middle of play, power is the first suspect. Switch to a wall adapter before you change any software setting.
Switching the TV Input and Using HDMI-CEC
Turn on the TV and select the HDMI input the stick is plugged into. Many TVs include HDMI-CEC, which lets one device turn the TV on or change inputs. Brands name it differently:
- Samsung: Anynet+
- LG: SimpLink
- Sony: Bravia Sync
- Vizio: CEC
CEC can cause strange behavior with game sticks, such as the TV switching away from the stick on its own. If that happens, disable CEC for that input in your TV settings.
Step 2: First Boot
After power and HDMI are connected, a healthy first boot looks like this:
- A short black screen
- A logo or splash screen
- A home screen or game menu
If you see a rainbow screen, endless boot loop, or “No signal” after about a minute, stop and check these in order: HDMI seating, power adapter, SD card seating, then a different HDMI port or TV.
Do not keep unplugging the device while it boots. Interrupting boot on SD-based systems can corrupt the card.
Step 3: Pair the Controllers
Controller setup is the heart of how to configure lcfgamestick correctly, because every other control setting depends on the device being detected properly.
Wireless Controllers With a USB Dongle
- Plug the dongle into the stick or the host device.
- Power on the controller.
- Hold the pairing or sync button for about three seconds, until the LED blinks quickly.
- Wait for the LED to turn solid. That usually means the dongle has accepted it.
Common causes of failed pairing:
- The dongle is plugged into a USB hub that has no power
- The dongle is too far from the controller, or blocked by a metal TV stand
- Two controllers are trying to pair at the same time
- The controller batteries are low
Pair one controller at a time, then add the second.
Wired Controllers
Plug the controller into the USB port and check whether the device recognizes it. On most systems, a recognized controller lets you move through the menu immediately. If nothing happens, try another cable first, because many cables sold with cheap devices are charge-only and carry no data.
Controller on a PC or Console
If your Lcfgamestick is an arcade-style controller used with a PC or console, detection is separate. On Windows, open “Set up USB game controllers” and check whether the device appears. On a Nintendo Switch, some controllers require wired communication to be turned on in the controller settings. Confirm whether that applies to your model before assuming it is faulty.
Step 4: Connect to Wi-Fi
Not every Lcfgamestick needs a network. If yours does, for updates, themes, or online features, follow these steps:
- Open the network or Wi-Fi menu.
- Choose your network and enter the password.
- Wait for a confirmation, then test by checking for updates.
Many budget sticks only support 2.4 GHz Wi-Fi. If your router uses a combined network name for 2.4 and 5 GHz, the stick may fail to connect. In that case, create a separate 2.4 GHz network name in your router settings, or temporarily disable 5 GHz while you set up.
Some devices also have no Wi-Fi at all, and rely on an SD card for everything. If you cannot find a network menu, that is probably the reason.
Step 5: Set Up Display Settings
A game stick that works but looks wrong usually has a display setting problem.
| Setting | What it does | What to try |
|---|---|---|
| Resolution | Output size sent to your TV | Start at 1080p, and move to 4K only if the box claims support and your TV handles it |
| Refresh rate | How many frames per second the TV shows | 60 Hz is the standard for retro games |
| Aspect ratio | Shape of the image | 4:3 for old games, 16:9 for stretched fullscreen |
| Overscan or screen size | Crops or shrinks the edges | Adjust if menu text is cut off at the edges |
If a 4K label is on the box, do not assume games render in 4K. On many sticks, 4K is only the output signal, while games run at their original low resolution.
Step 6: Configure Controls and Button Mapping
Once the device is detected, the controller needs to feel right. This is where most of the “special settings” talk lives, and also where most pages stay vague. Here is what the common terms mean.
| Term | Plain meaning | When to change it |
|---|---|---|
| Deadzone | The small area around the center of an analog stick where movement is ignored | Reduce it if the stick feels sluggish, raise it if the cursor drifts on its own |
| Sensitivity | How far the on-screen action moves per stick movement | Lower for precision games, higher for fast movement |
| Response curve | How stick movement maps to output | Linear is the predictable default |
| Polling rate | How often the controller reports its state | Rarely adjustable on cheap devices |
| Button mapping | Which physical button sends which action | Change it to match the game’s original layout |
Setting Deadzone Safely
A simple method, in order:
- Open a test screen or game that shows stick input.
- Release the stick and watch for movement.
- If the stick moves by itself, raise the deadzone a little at a time.
- If the stick feels slow to respond, lower it a little at a time.
Change one value at a time. Changing sensitivity, deadzone, and curve together makes it impossible to know which change helped.
Mapping Buttons
For retro games, follow the original controller’s layout. If a game used A to jump and B to run, keep those functions on the buttons that feel natural for your hand, and keep the same layout across games where possible. Muscle memory matters more than the labels printed on the buttons.
Using Hotkeys
If your device runs an emulator such as RetroArch, set a hotkey for opening the menu, saving a state, and quitting a game. Set these before you start playing. Many users lose progress because they have no safe way to exit a game.
Step 7: Manage the SD Card and Games
Many sticks and handhelds run from a microSD card, so storage problems often look like device problems.
Card Size and Format
| Format | Max file size | Typical use |
|---|---|---|
| FAT32 | 4 GB per file | Maximum compatibility with simple devices |
| exFAT | Very large | Larger cards and bigger game files |
Check your device’s documentation before reformatting, because some systems only read one format. Reformatting erases everything on the card, so copy the contents to your computer first.
Seating and Safe Removal
Power the device off before removing the card, and push the card in until it clicks. A loose card causes freezing, missing games, and corrupted save files.
A Note on Game Files
If you add your own game files, use games you own or are legally allowed to use. Copying ROMs for games you do not own is generally copyright infringement in the United States. Preloaded libraries on cheap sticks often contain the same kind of unlicensed copies, which is a reason to treat the included card as disposable and to back up any save files you care about.
Step 8: Update Firmware, and Know the Risks
Updates can fix bugs, but they can also break an otherwise working device. Follow this order:
- Write down your current version number.
- Back up saves and settings to your computer.
- Use the update method named in your manual or on the official product page.
- Do not power off during an update.
Custom Firmware
On handheld devices, community firmware such as ArkOS or JELOS is popular because it supports many systems and updates often. It also has risks: it may void any warranty, may not support every hardware revision, and a wrong image can leave the device unbootable. Only flash firmware that explicitly lists your exact model, and keep your original card image until you are sure the new one works.
Troubleshooting Table
Use this table to go from symptom to fix quickly.
| Symptom | Likely cause | Fix |
|---|---|---|
| No signal on TV | Wrong input, loose HDMI, weak power | Reseat HDMI, use the extender, use a wall adapter |
| Flickering or random reboots | Underpowered USB port | Switch to a 5V wall adapter |
| Boot loop | Corrupt or loose SD card | Reseat the card, test with another card |
| Controller not detected | Charge-only cable, dongle on a hub | Use a data cable, plug the dongle directly in |
| Stick drift | Deadzone too low or worn hardware | Raise the deadzone, recalibrate |
| Buttons feel wrong | Default mapping does not match the game | Remap buttons per game |
| TV switches input by itself | HDMI-CEC | Disable CEC for that input |
| Wi-Fi will not connect | 5 GHz only router or wrong password | Use a 2.4 GHz network and retype the password |
| Games missing | Wrong SD format or folder structure | Check format and file placement |
How to Spot a Clone or a Misleading Listing
Because the name is used for many unbranded products, check these before you trust a seller or a guide:
- The seller shows no model number, only a brand-like name
- The box claims “20,000 games” or other unrealistic numbers
- The reviews were all posted within a few days
- The photos show a different device than the one described
- There is no return policy, or the window is under 14 days
None of these proves a product is bad. They do mean you should test it early and keep your receipts.
Quick Setup Checklist
Print this or save it to your phone:
- [ ] Identify the device type and model number
- [ ] Screenshot the listing and keep the receipt
- [ ] Connect HDMI directly, using the extender if needed
- [ ] Use a wall power adapter
- [ ] Select the correct TV input
- [ ] Disable HDMI-CEC if the input keeps switching
- [ ] Pair one controller at a time
- [ ] Test the deadzone and map your buttons
- [ ] Set resolution to 1080p and refresh rate to 60 Hz
- [ ] Check the SD card format and back up saves
- [ ] Set a menu hotkey before playing
Frequently Asked Questions
What is the first thing to do when learning how to configure lcfgamestick?
Identify which device you have by checking for an HDMI plug, a screen, or a joystick body, then find the model number on the label.
Why does my Lcfgamestick keep restarting?
The most common cause is an underpowered USB port on the TV. Switch to a 5V wall adapter.
Can I use an Lcfgamestick without Wi-Fi?
Yes, many models run entirely from an SD card and never need a network. Wi-Fi is only needed for updates or online features, if your model has them.
Why is my controller not recognized?
Try a different USB cable, since many are charge-only, and plug a wireless dongle directly into the device rather than a hub.
What deadzone setting should I use?
There is no universal number. Raise it until stick drift stops, then lower it until the stick feels responsive.
Is it safe to flash custom firmware?
It can work well, but it carries risk and may void any warranty. Only use firmware that lists your exact model and keep a backup of the original card.
Should I use FAT32 or exFAT for the SD card?
Use whichever your device supports. FAT32 is the safest default, while exFAT handles larger cards and files.
Final Thoughts
The reason so many people struggle with how to configure lcfgamestick is not difficult software. It is the combination of unclear product names, weak power supplies, charge-only cables, and settings changed all at once. Identify the device, fix power and connection first, pair one controller at a time, and change one setting per test.
If you follow the order in this guide, most problems show up at the step where they start rather than three steps later. Keep your listing screenshot and receipt until you are sure the device works the way you expect.